
How Ostomy Irrigation Gives Me More Freedom

Why I Started Irrigating
When I first heard about irrigation, I wasn’t sure it was for me. It sounded complicated and time-consuming, and at that point, I was still learning how to live day to day with my ostomy.
But once I understood what it could do, I realized it was an option that could give me more freedom, especially when I wanted to wear something more fitted or attend a special event without worrying about a full bag.
I don’t irrigate all the time, but when I do, it makes a big difference in how I feel.
If you’re more of a visual learner, you can watch my quick video here where I walk through exactly how I do it and what to expect.
What Is Ostomy Irrigation?
Irrigation is a process that helps empty the colon through the stoma by gently flushing it with warm water. It’s most often used by people with a colostomy in the descending or sigmoid colon and can help regulate when bowel movements occur.
It takes time usually between 45 minutes and an hour and a half but when done properly, it can provide a sense of control and comfort.
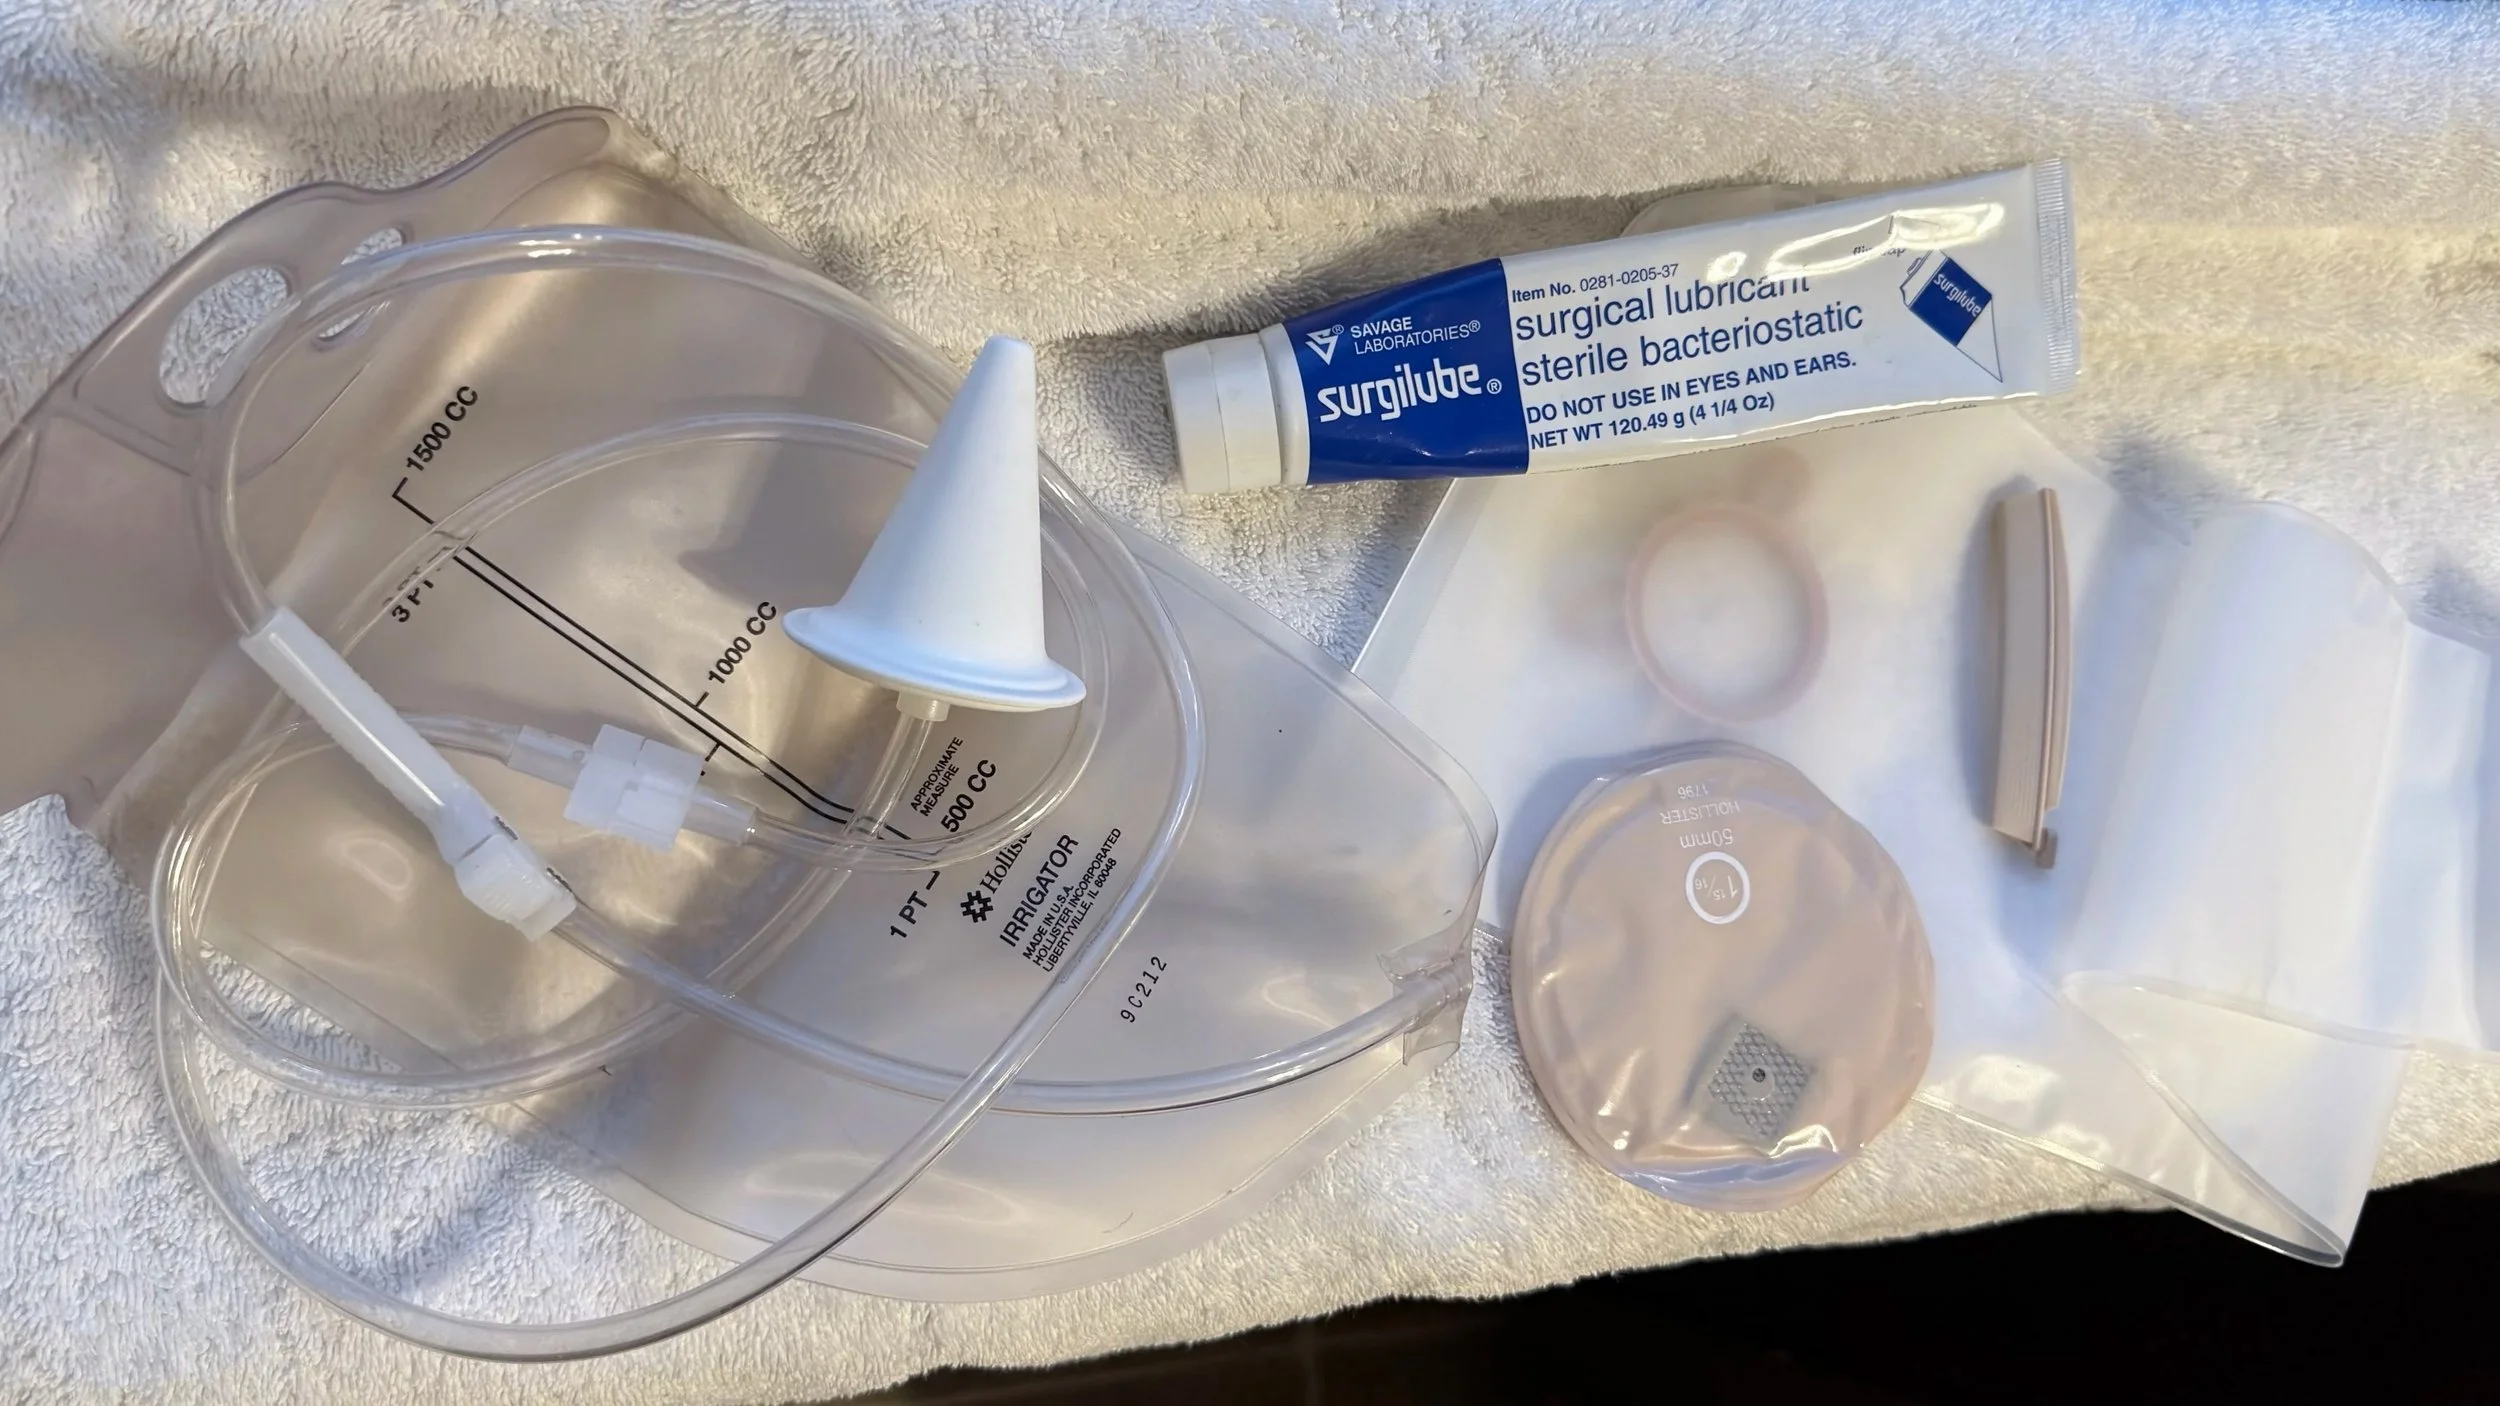
What You’ll Need
Before you start, you’ll want to make sure you have the right supplies:
Irrigation bag with tubing and a flow-control clamp
Irrigation cone tip
Irrigation sleeve
Lubricant
A stoma cap or small pouch for afterward
How I Irrigate: Step by Step
This is the process I follow when I do irrigation at home:
Set up your flange and sleeve
Attach your flange as you normally would, then snap on your irrigation sleeve. The bottom of the sleeve should hang into the toilet or basin.Prepare your irrigation bag
Fill the irrigation bag with warm (not hot) water, about body temperature and hang it at shoulder height.Insert the cone
Lubricate the cone tip and gently insert it into your stoma.Let the water flow slowly
Open and close the clamp every few seconds to let the water flow gradually. You don’t want to rush this part.Wait and release
Once the water is in, remove the cone, close the sleeve, and wait while your colon empties. This can take 30–45 minutes, sometimes a bit longer.Finish up
When you’re done, empty the sleeve into the toilet, clean your supplies, and cover your stoma with a small cap or mini pouch.
I usually use this method before a big day or when I know I’ll be wearing something that fits closely. It’s not something I do daily, but it gives me flexibility when I want it.
Safety and What to Know
Irrigation isn’t for everyone and it’s important to talk with your doctor or ostomy nurse before trying it.
It’s generally not recommended if you have an ileostomy, urostomy, diarrhea, a prolapsed stoma, or certain medical conditions.
If your healthcare team gives you the go-ahead, they can also help you determine the right water temperature, timing, and schedule for your needs.
Why It Works for Me
Irrigation gives me a sense of control and honestly, a bit of freedom. It lets me plan my day, travel, or wear clothes that make me feel confident.
I know it’s not for everyone, but for me, it’s been one of those tools that helps me live life on my terms.
And that’s what this whole journey has been about figuring out what works best for my body and my lifestyle.
Final Thought
If you’re curious about irrigation, start by asking your healthcare team about it. There’s no one-size-fits-all approach, but when done safely, it can make a huge difference in comfort and confidence.
The more you learn, the more empowered you’ll feel and that’s what I hope this post helps you see.
You May Also Like
The People Who Got Me Through It — My story of those first few days after surgery and how support made all the difference.
The Little Things I’m Most Grateful For — Finding gratitude in the everyday moments.
If this post helped you or you know someone who could benefit from it, share it with them. You can also join my Ostomy Living newsletter for weekly stories, practical tips, and encouragement.